IntelliJ IDEA is a free and open-source (yay!) IDE for Java development. It’s a huge-huge-huge improvement over the slow and ageing Eclipse. Recently, I wanted to do some programming practice, so I thought why not in Java. I started by writing my code in good ol’ Notepad++. Very soon I reminded myself about my TDD resolution — to never write code without unit tests. This meant needing something serious to write my Java code. It was a good opportunity to try out IDEA, something I had been meaning to do since I learnt that Android Studio is based on it (that was long ago, like 3-4 years ago).
Creating a Java project and running/debugging code in IDEA is pretty simple and quick. Configuring IDEA to support JUnit 5 tests, on the other hand, is no child’s play. It took my literally more than a day to get it to work. And hence this blog post, which is a note to self to quickly set up things in future.
If you are interested in checking the Java project that I had created in IDEA (referred to in my screenshots below), check my GitHub repo.
Step 0: Set up your dev environment
Ensure that you have the following installed on your computer:
- JDK 10
- IntelliJ IDEA (Community Edition)
- Gradle 4.8+
It’s worth noting that IDEA comes with a bundled distribution of Gradle (it was 4.4 for me), but it’s too old to work with JDK 10.
Step 1: Create a new Gradle project
I had been away from Java development since long, so choosing one from Ant, Maven and Gradle was all the same for me. I ended up with Gradle as my choice of build / package management tool as I had personally seen so many open-source projects (including Android apps) use it.
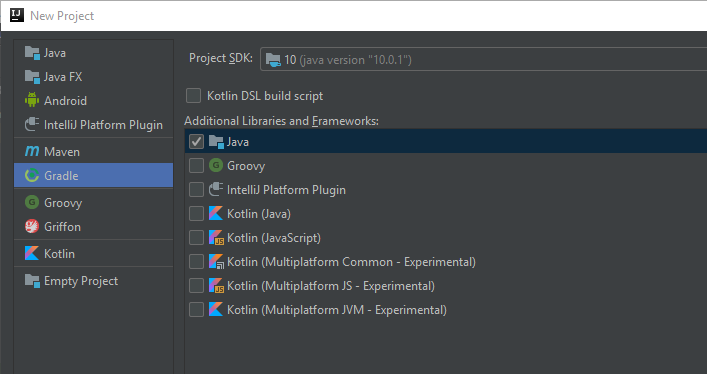
Go to File -> New -> Project -> Gradle, and create a new Gradle project. Be sure to select ‘Java’ from Additional Libraries and Frameworks list. Enter your project name in artifactId field on the next screen.
Step 2: Add JUnit dependencies
Once your Gradle project is created and ready, open your build.gradle file. Add the following references in its dependencies section.
dependencies {
    testCompile("org.junit.platform:junit-platform-launcher:1.2.0")
    testCompile("org.junit.jupiter:junit-jupiter-engine:5.2.0")
    testCompile("org.junit.vintage:junit-vintage-engine:5.2.0")
}
After making these changes, IDEA will automatically offer you to import new settings. Click “Import settings” to sync your Gradle project. If this doesn’t happen with you, manually sync by opening the Gradle panel from the right (or bottom) of your IDE.
Step 3: Add a new Java module
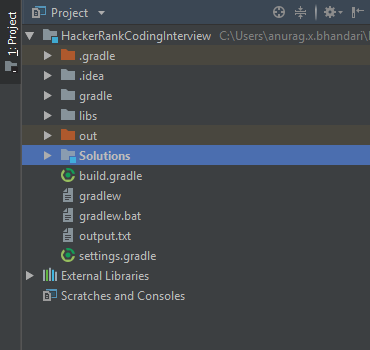
Time to add a module to store/organize our actual Java code. In the Project panel on the left, right-click your Gradle project’s name and select New -> Module -> Java. Give it an appropriate name (eg. app), and finish. Your project structure will now look like this (new Java module is selected):
Step 4: Create Maven-style sources and tests file structure
Being a Java developer, you already understand the importance of organizing your source files in folders that correspond to their package names. JUnit tests are also .java source files, but these should be stored separately from the main source files. It doesn’t matter if you use the same or different package name for your main and test source classes. I chose the same package name for easy interoperability.
If you choose a package name such as com.example.myapp, your project’s folder structure should look like this:
- MyGradleProject
- app
- src
- main
- java
- com
- example
- myapp
- example
- com
- java
- test
- java
- com
- example
- myapp
- example
- com
- java
- main
- src
- app
So, all main source .java files will go inside main‘s myapp folder. All test .java files will go inside test‘s myapp folder.
Open file explorer and create these folders. I did this manually. If you know a better (and more elegant) way to do this directly from IDEA, do let me know as well!
Step 5: Mark your Sources and Tests folder
IDEA cannot automatically distinguish between your main and tests folders. It needs to know from you about it. Go to File -> Project Structure -> Modules.
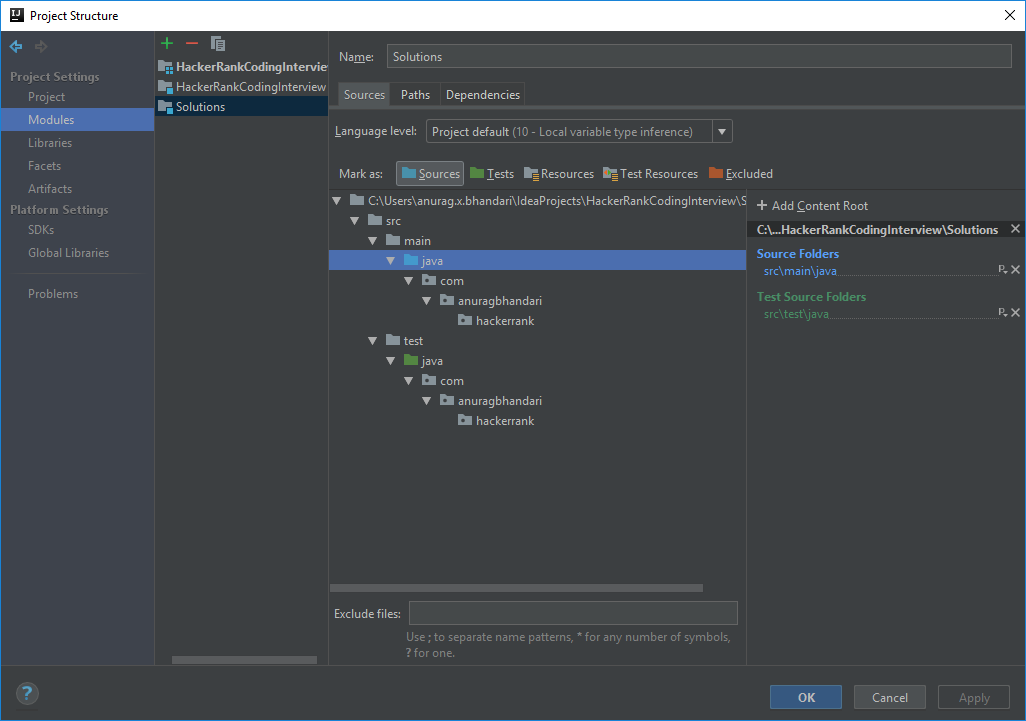
Select your Java module and open the Sources tab. Expand the entire folder tree. Select the java folder inside main and click Mark as Sources button. Similarly, select the java folder inside test and click Mark as Tests button. Your folders will be marked in blue (Sources) and green (Tests).
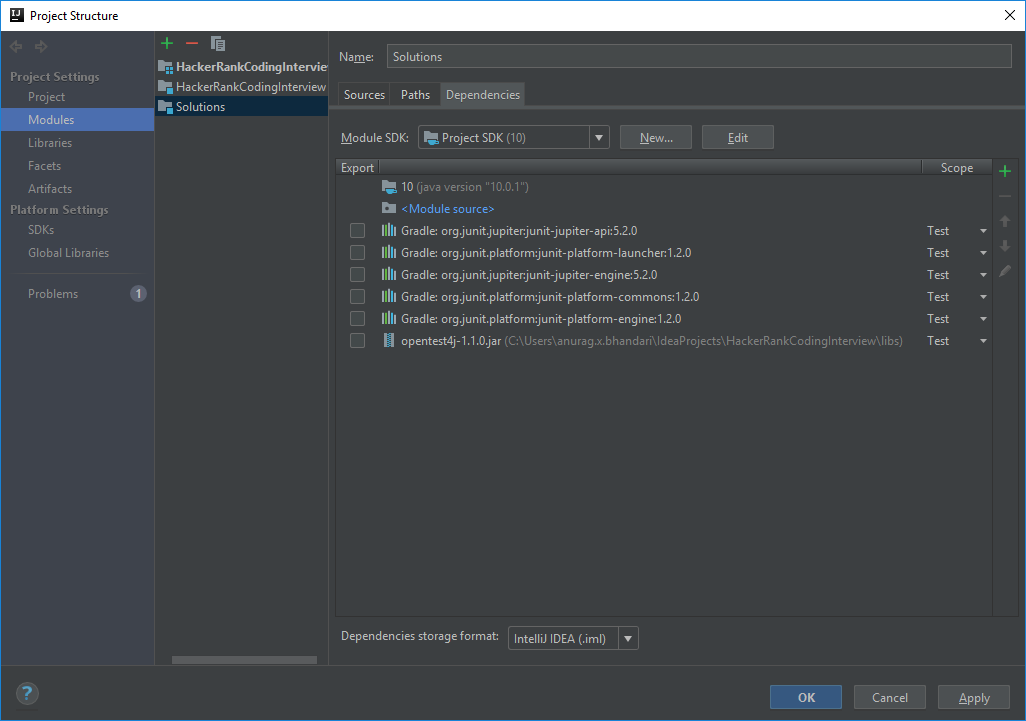
Step 6: Add JUnit libraries to classpath
Open Project Structure settings again and go to your Java module. In the Dependencies tab, click the + icon, select Library, and choose all junit libraries from the list (all except vintage-engine).
JUnit’s testing engine Jupiter depends on opentest4j. I couldn’t find this vital piece of information mentioned anywhere. Download its JAR file from its Maven repo. Then, in the Dependencies tab click + -> JARs or directories -> location of the JAR you just downloaded. The final dep list should look like this:
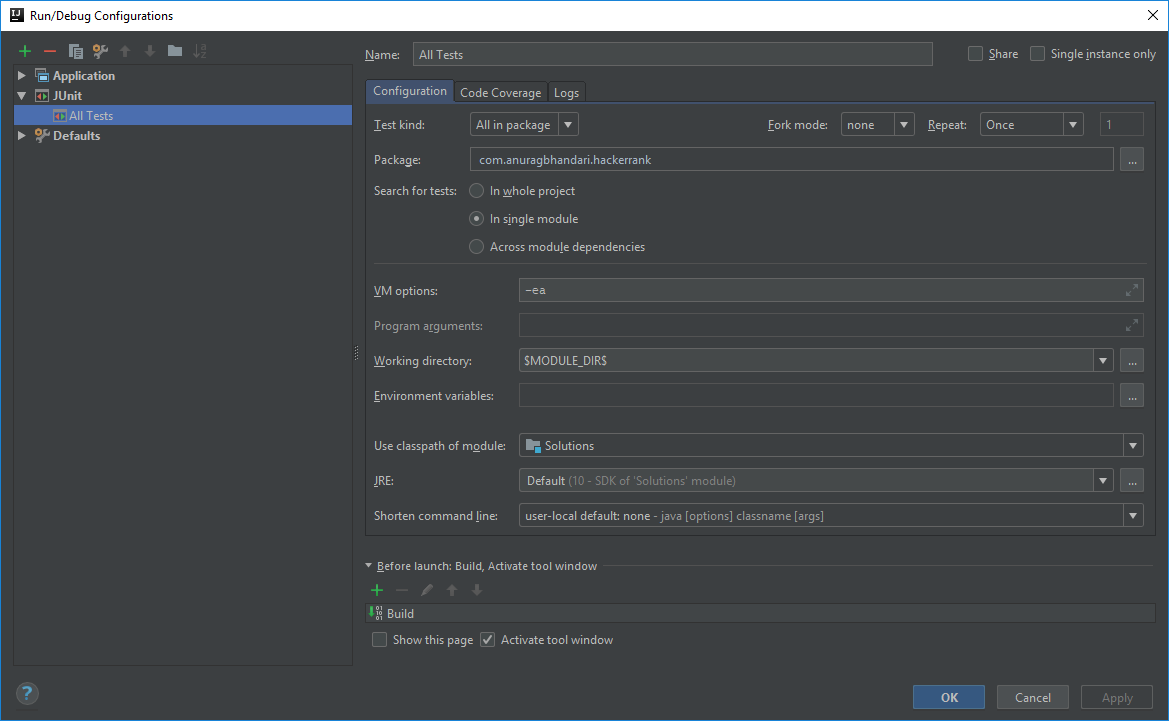
Step 7: Create a new run configuration to run JUnit tests
Once you have written your Java programs and corresponding unit tests, it’s natural to think “now how the hell do I run my unit tests?” IDEA provides no intuitive way to do this. Go to Run -> Edit configurations -> + -> JUnit. Name your new configuration (eg. All Tests). Have it look like the following:
Step 8: Write code and run tests
Code along and write your tests. Prefer TDD, if you can. Here is a glimpse of my BDD-style unit tests:
@Nested @DisplayName("given a valid array of integers and a rotation count") class CorrectnessTests { @Test @DisplayName("perform the given number of left rotations and return the correct output") void checkLeftRotationOutput() { int[] arrayOne = new int[] {1, 2, 3, 4, 5}; int arrayOneRotations = 4; int[] arrayOneRotated = new int[] {5, 1, 2, 3, 4}; int[] arrayTwo = new int[] {41, 73, 89, 7, 10, 1, 59, 58, 84, 77, 77, 97, 58, 1, 86, 58, 26, 10, 86, 51}; int arrayTwoRotations = 10; int[] arrayTwoRotated = new int[] {77, 97, 58, 1, 86, 58, 26, 10, 86, 51, 41, 73, 89, 7, 10, 1, 59, 58, 84, 77}; assertAll(() -> assertArrayEquals(arrayOneRotated, ArrayLeftRotation.rotLeft(arrayOne, arrayOneRotations)), () -> assertArrayEquals(arrayTwoRotated, ArrayLeftRotation.rotLeft(arrayTwo, arrayTwoRotations))); } } |
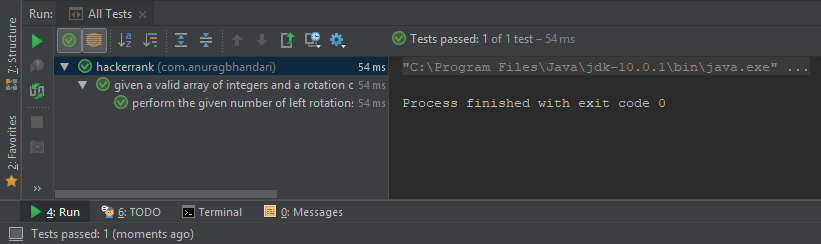
Run your All Tests configuration. Hopefully, you’ll see a greeny result.
Step 9: Relax and enjoy!
If you thought setting up unit testing for Java was a breeze in IDEA, I have a question for you. Was it?
I saw “been” on your website; it might be a minor typo worth checking. A tool like spellradar.com usually clears this up quickly.
Cheers,
David Jones