I have been developing mobile web apps since quite some time now, mostly using popular JavaScript frameworks, like Sencha Touch, which give a native look & feel to the app. Web apps have their merits, but using a platform’s SDK in order to develop a true native app is is inevitable in cases where you exclusively want your app to be available offline and also leverage some OS niceties that are unavailable to plain JS apps.
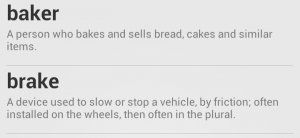
I recently got into developing a small, simple, but useful app for Android using using their latest API (level 16). The app — UnJumble — takes as input a jumbled English word, searches through a database of 58,000+ words for possible matches, and displays unscrambled word suggestions based on matches. As an added bonus, UnJumble fetches meanings for each unjumbled suggestion from Wordnik. Of course, the user gets to enable or disable the fetching of meanings as querying Wordnik requires an Internet connection, and this process may be a bit slow in some cases.
I’m currently in the process of giving finishing touches to UnJumble to prepare it for publishing on Google Play store. UnJumble is now available on Google Play. Throughout the journey of its development, I learned a lot of cool things about developing Android apps. In this article, I’ll share what all I learned by methodically teaching you how to build your own Android app using the several “components” I used to create UnJumble. But I’ll assume you’ve read at least a couple of tutorials on the Android Developers website, and that you are fairly familiar with a handful of Android SDK’s major terms and components.
Get ready to read about the journey of an Android app from its development to publishing.
Complete source code for UnJumble can be found at its github page.
Table of Contents
- The Development Environment
- Activity (ListActivity)
- ActionBar
- SearchView
- Back Stack, singleTop, onNewIntent
- ContentProvider & DatabaseHelper
- Cursors and Adapters
- The Loader framework
- adapter.setViewBinder()
- AsyncTask
- Progressbar
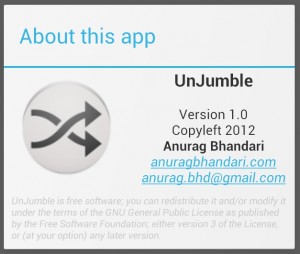
- AboutDialog
- PreferenceActivity: Saving & Reading User Preferences
- MISCELLANEOUS
The Development Environment
The most convenient way to develop Android apps is to use Eclipse for Java (preferably v.4.x — the Juno series). But first and foremost, install and configure the Android SDK. You cannot build your apps unless you have the SDK, right? Next, install Google’s ADT plugin for Eclipse. This plugin facilitates the development of Android apps in Eclipse by installing all necessary components & wizards, and makes it super-easy to build, run and deploy your apps.
Once you have everything set up, go to New Project > New Android App to get started.
Activity (ListActivity)
Think of an Android Activity as a window of a corresponding desktop application. In your app, you must have at least one Activity, conventionally named MainActivity. When you create a new Android app project, Eclipse by default creates a MainActivity for you. If our MainActivity is going to display a list of items, like in case of UnJumble, then we’ll make things simple by making our MainActivity class inherit from ListActivity, which comes bundled with all the components you’ll ever require to play around with lists.
public class MainActivity extends ListActivity implements LoaderManager.LoaderCallbacks<Cursor> |
Implementing the LoaderManager.LoaderCallbacks interface will make sure you can play around with databases with ease. More on this later.
In your Activity’s layout xml (activity_main.xml in most cases; it’s in your “res/layout” folder), be sure to include a ListView and an empty view. The IDs of both must match the following.
<ListView android:id="@android:id/list" android:layout_width="match_parent" android:layout_height="match_parent" android:layout_weight="1" android:drawSelectorOnTop="false"/> <TextView android:id="@android:id/empty" android:layout_width="match_parent" android:layout_height="match_parent" android:text="@string/text_empty" android:textColor="#555" android:textSize="25sp" android:textStyle="italic" /> |
ActionBar is the strip that you see at the top in most apps. It contains the name of the app and several action buttons, like search and menu (the three vertical dots). Basically, all the action buttons are part of the app’s main menu, but you can set them to always appear in the ActionBar. An ActionBar is always loaded by default in your app, but you need to create an XML (if Eclipse hasn’t already) containing contents of the menu.
Different activities can have different menu items. The menu for UnJumble’s MainActivity looks like:
<menu xmlns:android="http://schemas.android.com/apk/res/android"> <item android:id="@+id/menu_settings" android:title="@string/menu_settings" android:orderInCategory="98" android:showAsAction="never" /> <item android:id="@+id/menu_about" android:title="@string/menu_about" android:orderInCategory="99" android:showAsAction="never" /> <item android:id="@+id/menu_search" android:title="@string/menu_search" android:icon="@drawable/ic_action_search" android:showAsAction="always|collapseActionView" android:actionViewClass="android.widget.SearchView" /> </menu> |
It’s in a file matching MainActivity’s layout xml — res/menu/activity_main.xml — but you can keep any name.
Note that for my “Settings” and “About” menu items, I’ve set them to never show as action buttons in the ActionBar — android:showAsAction="never". Similarly, I’m making sure the “Search” menu item always appears as a button (and not inside the menu itself) — android:showAsAction="always|collapseActionView".
To import the menu in your activity, edit its onCreateOptionsMenu method to appear like:
@Override public boolean onCreateOptionsMenu(Menu menu) { getMenuInflater().inflate(R.menu.activity_main, menu); mainMenu = menu; // for later use elsewhere return true; } |
To attach actions with menu items / action buttons, make your onOptionsItemSelected method look like:
@Override public boolean onOptionsItemSelected(MenuItem item) { switch (item.getItemId()) { case R.id.menu_settings: Intent intent = new Intent(this, SettingsActivity.class); startActivity(intent); break; case R.id.menu_about: AboutDialog about = new AboutDialog(this); about.setTitle(getString(R.string.title_activity_about)); about.show(); break; } return super.onOptionsItemSelected(item); } |
In the above code, I’m basically starting UnJumble’s SettingsActivity on click of “Settings” menu item. For “About” menu item, I’m displaying a small AboutDialog.
SearchView
This is where all the action takes place — the searches. Android SDK offers this nifty little control called SearchView that provides a search button and a textbox to let users search through stuff in your app. UnJumble’s SearchView searches for unjumbled words in its SQLite database based on the input it gets from SearchView’s textbox.
Notice UnJumble’s menu XML has an option android:actionViewClass="android.widget.SearchView" for the “menu_search” menu item. This option makes the search action button to inherit its appearance from the SearchView control. But adding a SearchView is just the first step in enabling search in your app.
You’ll need to make your MainActivity search-enabled. In your app’s manifest XML, add the SEARCH intent-filter against MainActivity, and also set a label and a search hint for the SearchView (search hint is the help text for its textbox).
<activity android:name=".MainActivity" android:label="@string/title_activity_main"> <intent-filter> <action android:name="android.intent.action.MAIN" /> <category android:name="android.intent.category.LAUNCHER" /> </intent-filter> <intent-filter> <action android:name="android.intent.action.SEARCH" /> </intent-filter> <meta-data android:name="android.app.searchable" android:resource="@xml/searchable"/> </activity> |
Your “searchable” xml — res/xml/searchable.xml — should look like:
<searchable xmlns:android="http://schemas.android.com/apk/res/android" android:label="@string/app_name" android:hint="@string/hint_search" > </searchable> |
Finally, set up your app’s SearchManager and SearchView’s searchable info by putting this code in onCreateOptionsMenu method:
SearchManager searchManager = (SearchManager) getSystemService(Context.SEARCH_SERVICE); SearchView searchView = (SearchView) menu.findItem(R.id.menu_search).getActionView(); searchView.setSearchableInfo(searchManager.getSearchableInfo(getComponentName())); |
Back Stack, singleTop, onNewIntent
A very important thing I learned while developing was the concept of back stack in Android apps. I was frustrated with UnJumble creating multiple instances of MainActivity each time a search was done, primarily because after performing 4-5 searches (unjumblings), I had to press the back button like 7-8 times to quit the app. When I found about the back stack concept, I immediately resorted to using the singleTop launch mode. In fact, I found Android’s documentation recommending its use in searchable activities:
Using “singleTop” launch mode is usually ideal, because chances are good that once a search is done, the user will perform additional searches and it’s a bad experience if your application creates multiple instances of the searchable activity. So, we recommend that you set your searchable activity to “singleTop” launch mode in the application manifest.
singleTop basically makes sure that the topmost activity on your app’s back stack has only one instance throughout the app’s lifecycle. So no more nagging pile up of the searchable MainActivity because of multiple searches in one session.
Set the launchMode property of your searchable activity to singleTop in the Manifest.
<activity android:name=".MainActivity" android:label="@string/title_activity_main" android:launchMode="singleTop"> |
When using the normal launch mode, an activity’s onCreate() is called each time a new instance of it is created. So when using a searchable activity, the ACTION_SEARCH intent is received by onCreate() itself. But when using singleTop, the activity receives the search intent with a call to onNewIntent(Intent).
@Override protected void onNewIntent(Intent intent) { setIntent(intent); // optional // Get the intent, verify the action and get the query if (Intent.ACTION_SEARCH.equals(intent.getAction())) { String query = intent.getStringExtra(SearchManager.QUERY); queryWordTextView.setText("\'" + query + "\' " + getString(R.string.text_could_mean)); DoUnjumbling(query); } } |
ContentProvider & DatabaseHelper
Let’s talk database stuff now. I bet using SQLite is the best way to store data for your app. Not only a SQLite database is convenient and highly portable, the Android API provides a built-in set of classes to deal with SQLite. The most prominent of these classes is the SQLiteOpenHelper. It provides all the methods you’ll ever need to create, upgrade, open and read your DB. You use this class generally by creating your own “database helper” class that extents from SQLiteOpenHelper.
ContentProvider class provides a way to share access to your app’s data with other installed apps. That’s its basic purpose, its raison d’être. But because combined with a databasehelper it provides a very elegant way to deal with databases, we’ll use it internally for our app. Don’t forget to add your provider in the manifest XML; add the following just before the end of the application tag.
<provider android:name=".contentprovider.UnjumbleContentProvider" android:authorities="com.anuragbhandari.unjumble.contentprovider" > </provider> |
You can use a convenient GUI tool like SQLite Database Browser to quickly view and manipulate your SQLite DB file.
Also, for convenience purposes, we’ll create a class for structure of each table of our database. As UnJumble’s DB contains just one important table, its class looks like:
package com.anuragbhandari.unjumble.database; public class WordsTable { // Table Structure public static final String TABLE_WORDS = "Words"; public static final String COLUMN_ID = "_id"; public static final String COLUMN_WORD = "word"; public static final String COLUMN_WORDHASH = "word_hash"; public static final String COLUMN_WORDMEANING = "word_meaning"; } |
See the UnJumble source code for working examples of DatabaseHelper and ContentProvider.
If you’d like to learn more about database helper, content provider, cursor, adapter and a more detailed dealing with SQLite, check out this (very longish but) excellent article on vogella.com.
Cursors and Adapters
Database query results are returned as Cursor objects. So a Cursor is nothing but an object to store the result set of a DB query. A CursorAdapter provides a way to bind a fetched Cursor’s data to the UI (activity’s views). There are many available varieties of CursorAdapters, but we’ll be using SimpleCursorAdapter.
ListActivity class provides this method called setListAdapter(adapter) that let’s you update the activity’s list’s adapter to the one that has the fetched Cursor and data-to-view mappings.
// Fields from the database (projection). Must include the _id column for the adapter to work String[] from = new String[] { WordsTable.COLUMN_WORD, WordsTable.COLUMN_WORDMEANING, WordsTable.COLUMN_ID }; int[] to = new int[] { R.id.item_word, R.id.item_description, R.id.item_id }; adapter = new SimpleCursorAdapter(this, R.layout.activity_main_list_item, null, from, to, 0); |
Oh by the way, I forgot to mention that you can actually customize the way each item of your ListActivity’s list will look. In my case, I created a layout XML for this purpose, which I named activity_main_list_item.
<LinearLayout xmlns:android="http://schemas.android.com/apk/res/android" android:layout_width="match_parent" android:layout_height="wrap_content" android:orientation="vertical"> <TextView android:id="@+id/item_word" android:textSize="25sp" android:textStyle="bold" android:layout_width="match_parent" android:layout_height="wrap_content"/> <TextView android:id="@+id/item_description" android:textSize="13sp" android:layout_width="match_parent" android:layout_height="wrap_content" android:textColor="#777"/> <TextView android:id="@+id/item_id" android:textSize="10sp" android:layout_width="match_parent" android:layout_height="wrap_content" android:visibility="invisible"/> </LinearLayout> |
The Loader framework
It’s time to fetch records from database now! And no better way to do that than using the Loader framework. The LoaderManager class provides several useful methods that provide access to a Loader to fetch data. If you remember, our searchable MainActivity class is set to implement the Loader.LoaderCallbacks interface:
public class MainActivity extends ListActivity implements LoaderManager.LoaderCallbacks<Cursor> { |
This interface provides useful methods like:
onCreateLoader() — do stuff when a loader is created; your data fetching code goes here
onLoadFinished() — executes when loader has finished fetching the data; do stuff like filling your adapter and hiding the progressbar (if any)
@Override public Loader<Cursor> onCreateLoader(int id, Bundle args) { // Show a progress bar to display while the list loads showProgressBar(); // Create the CursorLoader String[] projection = { WordsTable.COLUMN_WORD, WordsTable.COLUMN_WORDMEANING, WordsTable.COLUMN_ID }; String selection = WordsTable.COLUMN_WORDHASH; String query = args.getString("query").toLowerCase(); CursorLoader cursorLoader = new CursorLoader(this, UnjumbleContentProvider.CONTENT_URI, projection, selection + " = ?", new String[] { query } , null); return cursorLoader; } |
@Override public void onLoadFinished(Loader<Cursor> loader, Cursor data) { // Remove the progressbar after data fetching has finished hideProgressBar(); // Fill adapter with fetched data (cursor) adapter.swapCursor(data); } |
To create a Loader, do something like:
Bundle bundle = new Bundle(); bundle.putString("query", query); // Start the Loader that'll fetch cursor into adapter if(getLoaderManager().getLoader(0) == null) { getLoaderManager().initLoader(0, bundle, this); } else { getLoaderManager().restartLoader(0, bundle, this); } |
adapter.setViewBinder()
Sometimes you’ll need to customize your data before the list’s adapter binds it to the target views. Although you cannot iterate a Cursor to modify certain data based on your needs, you can certainly use your adapter’s setViewBinder method to directly set desired values to views while data is being bound to them.
adapter.setViewBinder(new SimpleCursorAdapter.ViewBinder() { @Override public boolean setViewValue(View view, Cursor cursor, int column) { if(column == 1) { TextView tv = (TextView) view; String word = cursor.getString(cursor.getColumnIndex(WordsTable.COLUMN_WORD)); String wordMeaning = (wordMeanings == null ? getString(R.string.text_meaning_not_found) : wordMeanings.get(word).getText()); tv.setText(wordMeaning); return true; } return false; } }); |
AsyncTask
This is another gem of an item provided by the Android API. Use AsyncTask to do time consuming and IO-intensive stuff. Asynchronously running your code makes sure your app’s UI doesn’t hang (become unresponsive) while an intense operation is being performed. AsyncTask runs a task in the background, and publishes the results of that task to the UI as and when it becomes available. Check out AsyncTask on Android dev site for usage. Remember that all your code for intense operations will go in doInBackground() and the code for updating the UI using data returned by doInBackground will go in onPostExecute().
In UnJumble, I’m using an AsyncTask called FetchMeaningsTask to fetch the meanings of unjumbled word suggestions from an online source called Wordnik. You can see its code in MainActivity.java.
Progressbar
You’d want to show a progressbar while search is in progress, and hide it when the fetching of results is complete. Use the following two methods to show and hide a progressbar. We’ll be using the “indefinite” version of Android’s progressbar.
private void showProgressBar() { if(progressBar == null) { progressBar = new ProgressBar(this, null, android.R.attr.progressBarStyleLarge); progressBar.setLayoutParams(new LayoutParams(LayoutParams.WRAP_CONTENT, LayoutParams.WRAP_CONTENT, Gravity.CENTER)); progressBar.setIndeterminate(true); root = (ViewGroup) findViewById(android.R.id.content); } getListView().setEmptyView(progressBar); root.addView(progressBar); } private void hideProgressBar() { if(progressBar != null) { root.removeView(progressBar); getListView().setEmptyView(findViewById(android.R.id.empty)); } } |
AboutDialog

Of course you’d want to have a little about dialog in your app to give your users a little background information about your app and yourself.
Create the layout (res/layout/activity_about.xml) for your about dialog, something like:
<?xml version="1.0" encoding="utf-8"?> <TableLayout xmlns:android="http://schemas.android.com/apk/res/android" android:layout_width="wrap_content" android:layout_height="wrap_content" android:stretchColumns="*"> <TableRow> <ImageView android:layout_width="wrap_content" android:layout_height="wrap_content" android:layout_gravity="left|center" android:src="@drawable/shuffle" android:contentDescription="@string/text_app_logo" android:paddingLeft="13dp" /> <TextView android:id="@+id/info_text" android:gravity="center" android:layout_gravity="center" android:layout_width="fill_parent" android:layout_height="wrap_content" /> </TableRow> <TableRow> <TextView android:id="@+id/legal_text" android:layout_width="fill_parent" android:layout_height="wrap_content" android:textSize="10dip" android:textStyle="italic" android:layout_span="2" android:layout_margin="8dip" android:textColor="#cccccc" /> </TableRow> </TableLayout> |
Next, create the code file for this dialog, say AboutDialog.java:
public class AboutDialog extends Dialog { private static Context mContext = null; public AboutDialog(Context context) { super(context); mContext = context; } @Override public void onCreate(Bundle savedInstanceState) { setContentView(R.layout.activity_about); ... ... } |
Notice in the full code of AboutDialog.java that it is setting the “info_text” and “legal_text” views of the dialog by reading from the files res/raw/about.txt and res/raw/legal.txt respectively.
In the ActionBar section above, I showed you how to show the AboutDialog through the onOptionsItemSelected() method.
PreferenceActivity: Saving & Reading User Preferences

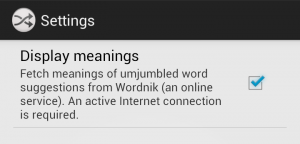
It’s very common to have a Settings screen in an app to store user preferences. Android offers this functionality via the PreferenceActivity class. Adding a settings activity is quite simple, and saving preferences is automatically managed by Android; reading saved preferences is as simple.
Create a settings activity, say SettingsActivity.
public class SettingsActivity extends PreferenceActivity { public static final String KEY_PREF_FETCH_MEANINGS = "pref_fetch_meaning"; @SuppressWarnings("deprecation") @Override public void onCreate(Bundle savedInstanceState) { super.onCreate(savedInstanceState); addPreferencesFromResource(R.xml.preferences); } } |
Next, create the layout of your settings activity — res/xml/preferences.xml.
<?xml version="1.0" encoding="utf-8"?> <PreferenceScreen xmlns:android="http://schemas.android.com/apk/res/android" > <CheckBoxPreference android:key="pref_fetch_meaning" android:title="@string/pref_fetch_meaning_title" android:summary="@string/pref_fetch_meaning_summ" android:defaultValue="true" /> </PreferenceScreen> |
To read preferences:
SharedPreferences sharedPref = PreferenceManager.getDefaultSharedPreferences(this); isFetchMeanings = sharedPref.getBoolean(SettingsActivity.KEY_PREF_FETCH_MEANINGS, true); |
UnJumble’s settings activity has just one preference, which is of boolean (checkbox) type. For more preference types, see Android’s guide page on Settings.
Refer to the ActionBar section above for the two lines of code needed to show the settings activity when “Settings” menu item is selected from the action bar.
MISCELLANEOUS
Checking network connectivity
Sometimes your app would want to access the Internet to fetch data. It’s a good practice to check network connectivity before attempting to access the Internet to avoid app crashes.
private boolean isNetworkAvailable() { ConnectivityManager connectivityManager = (ConnectivityManager) getSystemService(Context.CONNECTIVITY_SERVICE); NetworkInfo activeNetworkInfo = connectivityManager.getActiveNetworkInfo(); return activeNetworkInfo != null && activeNetworkInfo.isConnectedOrConnecting(); } |
uses-permission
For security reasons, Android mandates all apps to seek permission from the user if it wants to access certain restricted parts of the system, like contacts, sms, camera, network, etc. An app “seeks” permissions through the uses-permission tags in the Manifest. For example, accessing Internet and network information (like shown in the previous section) requires the following permission. Add this code near the top of your AndroidManifest.xml.
<uses-permission android:name="android.permission.ACCESS_NETWORK_STATE"/> <uses-permission android:name="android.permission.INTERNET"/> |
See this page for a comprehensive list of available permissions in Android.
Preventing App Crashes Due to Orientation Changes
There are some configuration changes, change in orientation being one of them, due to which Android stops and restarts your app’s current activity. In case of a ListActivity, it is common for it to cause an app crash because of an activity restart. You would not want your app to crash just because the user switched from portrait to landscape orientation, right? Then set the configChanges property of your activity:
<activity android:name=".MainActivity" android:label="@string/title_activity_main" android:configChanges="orientation|screenSize" android:launchMode="singleTop"> |
Checking Android’s OS Version
The Android API keeps evolving at a rapid pace, and new features in a more recent API version do not work in older API versions. You can do a check for the OS version as follows:
if(android.os.Build.VERSION.SDK_INT >= android.os.Build.VERSION_CODES.ICE_CREAM_SANDWICH) { // Do something } |
Icons
Of course you’ll need icons for use at several places in your app, including for the launcher icon. You can create icons using either the wonderful Android Icon Set wizard (in Eclipse: File > New > Other > Android > Android Icon Set) or the even more wonderful Android Asset Studio.
Wordnik
This is an excellent online resource for English words, meanings, synonyms, antonyms, example sentences, and more. It offers a free API that provides access to all the services offered by Wordnik. Sign up for your developer key, if you’d like to.
Publishing on GitHub
If you are developing your app as an open source one, as is the case with most apps today, you can share its source code by uploading it on the free (and rock-solid reliable) version control system GitHub.
- Create an account on GitHub.
- Create a new repository to store your app’s code.
- Install EGit (Eclipse plugin) to add your code to GitHub.
- Sit back and relax while your code gets uploaded to github!
Publishing on Google Play
Build a release-ready APK of your app, and take a couple hours to thoroughly read the publishing checklist for Google Play. All the best!


Very informative article. I got good points and suggestions from this. 🙂
Thank you.
This is very inspiring, as getting from the start & Having no real background in programming (aside from making some adventures on ZX-81 and MSX), this does sound like I could get started on developing something for my own Android based eBook reader and android app development training even this online course seems to be interesting http://www.wiziq.com/course/13599-professional-android-app-development-training-1-on-1-sessions. Has anyone tried any online courses so far. Please do provide a light on this also.
Thankyou for all the info also.
It should be fun to buy a new car! Driving a new car is such a great experience, and purchasing the car should
be fun as well. A lot of people would rather skip the whole purchasing process.
Keep the stress to a minimum using these tips.
[…] If you would like to learn what went behind making of this app, check out my article “The Making-of an Android App”, written as a tutorial on developing Android apps from a beginner’s perspective.http://www.anuragbhandari.com/2012/12/the-making-of-an-android-app/ […]